To be honest, I especially wanted to cover what happens after the cutting, because for me this has always been the part of steeking that was unclear. I completely understood the hows and whys of the cutting portion, but beyond that the steps to complete the route to 'finished sweater' have always been a grey area for me.
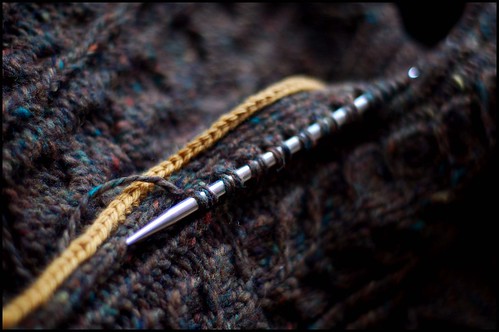
After the cutting you'll have two stockinette 'flaps' that need to be dealt with on either side of the cardigan opening. Again, the yellow wool acts as a good indicator where these flaps are on my sweater. The final step is to pick up stitches along these borders and work the button band. Depending on how many stitches you left for your steek, the width of your flaps (or "facings" as they are more correctly titled) will vary - my faccings are 3 stitches: 2 knits and 1 purl along each side of the cut. So then, we can now begin picking up the buttonband like so:

I love EZ's sensible formula for picking up stitches along a vertical edge. Instead of calculating your own stitch gauge vs. row gauge and doing all that unnecessary calculating, her trusty 2 to 3 ratio works in virtually all cases. That is, pick up 2 buttonband stitches for every 3 rows of knitting on the sweater body. This is the reason you see the stitches on my needle in pairs of two. Its a perfect ratio that is giving me a flat and even buttonband.
Once the necessary number of stitches have been picked up, knit back and forth until the bands are as wide as you need them to be, throwing buttonholes in on whatever row marks the halfway point. Simple as that.
As for the flaps/facings, they'll fold back naturally onto the wrong side of the fabric and behave nicely once all is said and done. I'll give mine a light steam with an iron to flatten them a bit more and to lessen bulk, but not much more than that is needed.
I'll probably post one more photo this week showing you how the steek is behaving once I have a more substantial amount of buttonband knitting done. All that's left is finding a few buttons that fit this beast. We're so very close to the finish!
I hope everyone had a great holiday weekend.
0 comments:
Post a Comment